

Picture by Google DeepMind
Deep studying is a department of the machine studying mannequin primarily based on neural networks. Within the different machine mannequin, the info processing to seek out the significant options is usually accomplished manually or counting on area experience; nevertheless, deep studying can mimic the human mind to find the important options, growing the mannequin efficiency.
There are various functions for deep studying fashions, together with facial recognition, fraud detection, speech-to-text, textual content technology, and lots of extra. Deep studying has turn into a typical strategy in lots of superior machine studying functions, and we’ve got nothing to lose by studying about them.
To develop this deep studying mannequin, there are numerous library frameworks we will depend on quite than working from scratch. On this article, we are going to focus on two completely different libraries we will use to develop deep studying fashions: PyTorch and Lighting AI. Let’s get into it.
PyTorch is an open-source library framework to coach deep-learning neural networks. PyTorch was developed by the Meta group in 2016 and has grown in recognition. The rise of recognition was because of the PyTorch function that mixes the GPU backend library from Torch with Python language. This mix makes the bundle simple to comply with by the person however nonetheless highly effective in creating the deep studying mannequin.
There are a couple of standout PyTorch options which are enabled by the libraries, together with a pleasant front-end, distributed coaching, and a quick and versatile experimentation course of. As a result of there are numerous PyTorch customers, the group improvement and funding have been additionally huge. That’s the reason studying PyTorch can be helpful in the long term.
PyTorch constructing block is a tensor, a multi-dimensional array used to encode all of the enter, output, and mannequin parameters. You may think about a tensor just like the NumPy array however with the aptitude to run on GPU.
Let’s check out the PyTorch library. It’s really helpful to carry out the tutorial within the cloud, akin to Google Colab in the event you don’t have entry to a GPU system (though it might nonetheless work with a CPU). However, If you wish to begin within the native, we have to set up the library through this web page. Choose the suitable system and specification you’ve.
For instance, the code under is for pip set up in case you have a CUDA-Succesful system.
pip3 set up torch torchvision torchaudio --index-url https://obtain.pytorch.org/whl/cu118
After the set up finishes, let’s strive some PyTorch capabilities to develop the deep studying mannequin. We are going to do a easy picture classification mannequin with PyTorch on this tutorial primarily based on their internet tutorial. We’d stroll on the code and have a proof of what occurred inside the code.
First, we might obtain the dataset with PyTorch. For this instance, we might use the MNIST dataset, which is the quantity handwritten classification dataset.
from torchvision import datasets

prepare = datasets.MNIST(
    root="image_data",
    prepare=True,
    obtain=True
)

take a look at = datasets.MNIST(
    root="image_data",
    prepare=False,
    obtain=True,
)
We obtain each the MNIST prepare and take a look at datasets to our root folder. Let’s see what our dataset appears like.
import matplotlib.pyplot as plt

for i, (img, label) in enumerate(checklist(prepare)[:10]):
    plt.subplot(2, 5, i+1)
    plt.imshow(img, cmap="grey")
    plt.title(f'Label: {label}')
    plt.axis('off')

plt.present()
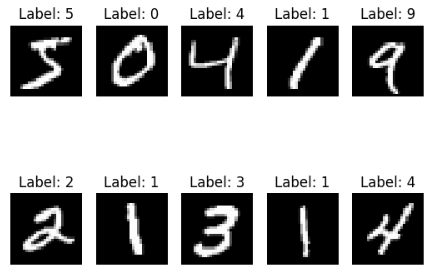
Each picture is a single-digit quantity between zero and 9, which means we’ve got ten labels. Subsequent, let’s develop a picture classifier primarily based on this dataset.
We have to rework the picture dataset right into a tensor to develop a deep studying mannequin with PyTorch. As our picture is a PIL object, we will use the PyTorch ToTensor operate to carry out the transformation. Moreover, we will robotically rework the picture with the datasets operate.
from torchvision.transforms import ToTensor
prepare = datasets.MNIST(
    root="knowledge",
    prepare=True,
    obtain=True,
    rework=ToTensor()
)

take a look at = datasets.MNIST(
    root="knowledge",
    prepare=False,
    obtain=True,
    rework=ToTensor()
)
By passing the transformation operate to the rework parameter, we will management what the info can be like. Subsequent, we might wrap the info into the DataLoader object so the PyTorch mannequin might entry our picture knowledge.
from torch.utils.knowledge import DataLoader
dimension = 64

train_dl = DataLoader(prepare, batch_size=dimension)
test_dl = DataLoader(take a look at, batch_size=dimension)

for X, y in test_dl:
    print(f"Form of X [N, C, H, W]: {X.form}")
    print(f"Form of y: {y.form} {y.dtype}")
    break
Form of X [N, C, H, W]: torch.Measurement([64, 1, 28, 28])
Form of y: torch.Measurement([64]) torch.int64
Within the code above, we create a DataLoader object for the prepare and take a look at knowledge. Every knowledge batch iteration would return 64 options and labels within the object above. Moreover, the form of our picture is 28 * 28 (top * width).
Subsequent, we might develop the Neural Community mannequin object.
from torch import nn

#Change to 'cuda' in case you have entry to GPU
machine="cpu"

class NNModel(nn.Module):
    def __init__(self):
        tremendous().__init__()
        self.flatten = nn.Flatten()
        self.lr_stack = nn.Sequential(
            nn.Linear(28*28, 128),
            nn.ReLU(),
            nn.Linear(128, 128),
            nn.ReLU(),
            nn.Linear(128, 10)
        )

    def ahead(self, x):
        x = self.flatten(x)
        logits = self.lr_stack(x)
        return logits

mannequin = NNModel().to(machine)
print(mannequin)
NNModel(
  (flatten): Flatten(start_dim=1, end_dim=-1)
  (lr_stack): Sequential(
    (0): Linear(in_features=784, out_features=128, bias=True)
    (1): ReLU()
    (2): Linear(in_features=128, out_features=128, bias=True)
    (3): ReLU()
    (4): Linear(in_features=128, out_features=10, bias=True)
  )
)
Within the object above, we create a Neural Mannequin with few layer construction. To develop the Neural Mannequin object, we use the subclassing methodology with the nn.module operate and create the neural community layers inside the__init__.
We initially convert the 2D picture knowledge into pixel values contained in the layer with the flatten operate. Then, we use the sequential operate to wrap our layer right into a sequence of layers. Contained in the sequential operate, we’ve got our mannequin layer:
nn.Linear(28*28, 128),
nn.ReLU(),
nn.Linear(128, 128),
nn.ReLU(),
nn.Linear(128, 10)
By sequence, what occurs above is:
- First, the info enter which is 28*28 options is reworked utilizing a linear operate within the linear layer and having 128 options because the output.
- ReLU is a non-linear activation operate that’s current between the mannequin enter and output to introduce non-linearity.
- 128 options enter to the linear layer and have 128 options output
- One other ReLU activation operate
- 128 options because the enter within the linear layer and 10 options because the output (our dataset label solely has 10 labels).
Lastly, the ahead operate is current for the precise enter course of for the mannequin. Subsequent, the mannequin would wish a loss operate and optimization operate.
from torch.optim import SGD

loss_fn = nn.CrossEntropyLoss()
optimizer = SGD(mannequin.parameters(), lr=1e-3)
For the subsequent code, we simply put together the coaching and take a look at preparation earlier than we run the modeling exercise.
import torch
def prepare(dataloader, mannequin, loss_fn, optimizer):
    dimension = len(dataloader.dataset)
    mannequin.prepare()
    for batch, (X, y) in enumerate(dataloader):
        X, y = X.to(machine), y.to(machine)
        pred = mannequin(X)
        loss = loss_fn(pred, y)

        loss.backward()
        optimizer.step()
        optimizer.zero_grad()

        if batch % 100 == 0:
            loss, present = loss.merchandise(), (batch + 1) * len(X)
            print(f"loss: {loss:>2f}  [{current:>5d}/{size:>5d}]")

def take a look at(dataloader, mannequin, loss_fn):
    dimension = len(dataloader.dataset)
    num_batches = len(dataloader)
    mannequin.eval()
    test_loss, right = 0, 0
    with torch.no_grad():
        for X, y in dataloader:
            X, y = X.to(machine), y.to(machine)
            pred = mannequin(X)
            test_loss += loss_fn(pred, y).merchandise()
            right += (pred.argmax(1) == y).sort(torch.float).sum().merchandise()
    test_loss /= num_batches
    right /= dimension
    print(f"Check Error: n Accuracy: {(100*right):>0.1f}%, Avg loss: {test_loss:>2f} n")
Now we’re able to run our mannequin coaching. We’d determine what number of epochs (iterations) we need to carry out with our mannequin. For this instance, let’s say we wish it to run for 5 occasions.
epoch = 5
for i in vary(epoch):
    print(f"Epoch {i+1}n-------------------------------")
    prepare(train_dl, mannequin, loss_fn, optimizer)
    take a look at(test_dl, mannequin, loss_fn)
print("Accomplished!")
The mannequin now has completed their coaching and in a position for use for any picture prediction exercise. The consequence might range, so anticipate completely different outcomes from the above picture.
It’s just some issues that PyTorch can do, however you’ll be able to see that constructing a mannequin with PyTorch is simple. In case you are within the pre-trained mannequin, PyTorch has a hub you’ll be able to entry.
Lighting AI is an organization that gives varied merchandise to reduce the time to coach the PyTorch deep studying mannequin and simplify it. One in all their open-source product is PyTorch Lighting, which is a library that provides a framework to coach and deploy the PyTorch mannequin.
Lighting provides a couple of options, together with code flexibility, no boilerplate, minimal API, and improved crew collaboration. Lighting additionally provides options akin to multi-GPU utilization and swift, low-precision coaching. This made Lighting an excellent various to develop our PyTorch mannequin.
Let’s check out the mannequin improvement with Lighting. To begin, we have to set up the bundle.
With the Lighting put in, we might additionally set up one other Lighting AI product known as TorchMetrics to simplify the metric choice.
With all of the libraries put in, we might attempt to develop the identical mannequin from our earlier instance utilizing a Lighting wrapper. Under is the entire code for creating the mannequin.
import torch
import torchmetrics
import pytorch_lightning as pl
from torch import nn
from torch.optim import SGD

# Change to 'cuda' in case you have entry to GPU
machine="cpu"

class NNModel(pl.LightningModule):
    def __init__(self):
        tremendous().__init__()
        self.flatten = nn.Flatten()
        self.lr_stack = nn.Sequential(
            nn.Linear(28 * 28, 128),
            nn.ReLU(),
            nn.Linear(128, 128),
            nn.ReLU(),
            nn.Linear(128, 10)
        )
        self.train_acc = torchmetrics.Accuracy(process="multiclass", num_classes=10)
        self.valid_acc = torchmetrics.Accuracy(process="multiclass", num_classes=10)

    def ahead(self, x):
        x = self.flatten(x)
        logits = self.lr_stack(x)
        return logits

    def training_step(self, batch, batch_idx):
        x, y = batch
        x, y = x.to(machine), y.to(machine)
        pred = self(x)
        loss = nn.CrossEntropyLoss()(pred, y)
        self.log('train_loss', loss)

        # Compute coaching accuracy
        acc = self.train_acc(pred.softmax(dim=-1), y)
        self.log('train_acc', acc, on_step=True, on_epoch=True, prog_bar=True)
        return loss

    def configure_optimizers(self):
        return SGD(self.parameters(), lr=1e-3)

    def test_step(self, batch, batch_idx):
        x, y = batch
        x, y = x.to(machine), y.to(machine)
        pred = self(x)
        loss = nn.CrossEntropyLoss()(pred, y)
        self.log('test_loss', loss)

        # Compute take a look at accuracy
        acc = self.valid_acc(pred.softmax(dim=-1), y)
        self.log('test_acc', acc, on_step=True, on_epoch=True, prog_bar=True)
        return loss
Let’s break down what occur within the code above. The distinction with the PyTorch mannequin we developed beforehand is that the NNModel class now makes use of subclassing from the LightingModule. Moreover, we assign the accuracy metrics to evaluate utilizing the TorchMetrics. Then, we added the coaching and testing step inside the class and arrange the optimization operate.
With all of the fashions set, we might run the mannequin coaching utilizing the reworked DataLoader object to coach our mannequin.
# Create a PyTorch Lightning coach
coach = pl.Coach(max_epochs=5)

# Create the mannequin
mannequin = NNModel()

# Match the mannequin
coach.match(mannequin, train_dl)

# Check the mannequin
coach.take a look at(mannequin, test_dl)

print("Coaching End")
With the Lighting library, we will simply tweak the construction you want. For additional studying, you would learn their documentation.
PyTorch is a library for creating deep studying fashions, and it offers a simple framework for us to entry many superior APIs. Lighting AI additionally helps the library, which offers a framework to simplify the mannequin improvement and improve the event flexibility. This text launched us to each the library’s options and easy code implementation.
Cornellius Yudha Wijaya is a knowledge science assistant supervisor and knowledge author. Whereas working full-time at Allianz Indonesia, he likes to share Python and Information ideas through social media and writing media.

